Installation Guide
Please take a few minutes to read through this guide before getting started.
1. Measuring
Please refer to the comprehensive measuring guide on our website:
www.slido.in/measuring-guide.html
Please measure carefully both the opening height and width in a minimum of three places. Please provide the smallest measurement for the height and for the width.

3. Tools & fixings you will need
- Electric Drill
- Screwdriver
- Hacksaw (recommended 42 tpi blade to trim track sets)
- Electric Jigsaw* / Handsaw*
- Spirit Level
- Set Square
- Tape to measure
- Check the packages sent from the factory
- Open the sliding door package in front of the wardrobe where these have to be installed
- The Sliding door specifications document is enclosed in the package. Please verify the same with respect to the aperture of the wardrobe in which the doors have to be installed.
Once the above are done commence the installation of the sliding doors in the sequence below
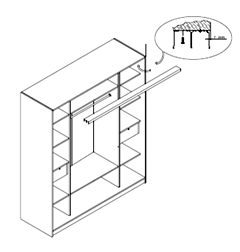
1. TOP TRACK FASTENING
Fasten Top Track, as shown. Top track should be fixed at approximately 50mm from each end of track
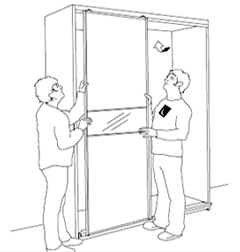
2. INSTALL DOOR
Lean the door as shown, while inserting the top rollers of the door into the channels of the top track. Position the bottom track on the floor directly below. The top track, ease the door down, so as the bottom rollers snap into the bottom track.
PLEASE NOTE:
Use the sprit level to make sure the door is straight with respect to the wardrobe. Fasten the bottom track.
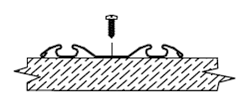
3. INSTALL BOTTOM TRACK
Position the bottom track on the floor directly below the top track and screw to the floor after installing the doors. Bottom track is affixed after door installation to ensure a perfectly vertical door installation.
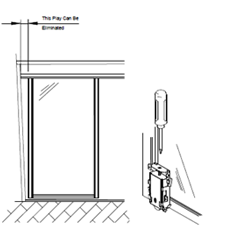
4. ADJUST DOORS
Adjust vertical height of rollers as shown to ensure Parallelism with side wall of closet
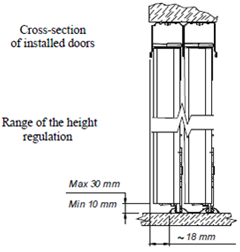
Displacement of the bottom track in the face of the front of the top track
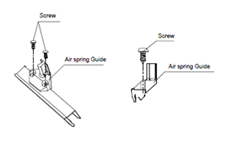
5. AIR SPRING INSTALLATION IN TOP TRACK
During door installation, an air spring guide should be mounted to the top rail using 2 included screw as shown in the diagram.
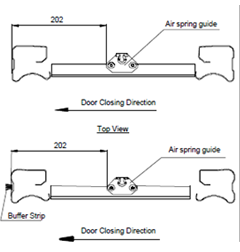
Note:
- Air spring should be stretched before assembling door
- Too strong impact of door hitting can damage the air spring or the air spring guide
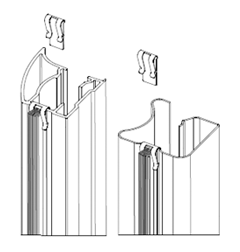
6. BUFFER STRIP CLIP FIXING
Clips are slid onto top & bottom ends of the profile in the place where buffer strips are installed. Fig. shows a typical installation of buffer strip clips can also be used in various profiles.
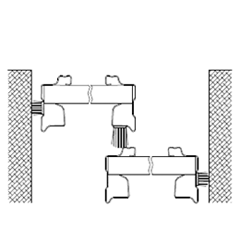
7. BUFFER STRIP MOUNTING
Apply adhesive buffer strip short on the side groove of the stile near the wall or the side wall. Apply adhesive Buffer strip long on the rear side of the stile of the front doors between the door overlap.
